baardbi
Well-known member
This will allow you to have several sets of game object tiles in your game. This is useful if you want the player graphics to change on certain screens. However this method will not let you change them on the fly (during gameplay). They need to be loaded on a screen by screen basis. What game object tileset will be loaded is based on what you set up in userScreenByte0. This tutorial will only add one new tileset.


Before you begin make sure you have set up user screen bytes:
 www.nesmakers.com
1. In the GraphicAssets folder of your game copy GameObjectTiles.bmp and paste it in the same folder. Rename the new file to GameObjectTiles1.bmp. What you do next will depend on what you want to achieve. If you for example want the player to get an armor during a cutscene and start the next level with the player object wearing the armor, then you need to make sure that the tilesets are set up identically. If you want the player to have different colors you can just set up the new screen with a different palette.
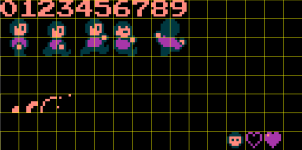
GameObjectTiles.bmp

GameObjectTiles1.bmp

2. Before you test the game you need to export the CHR graphics for GameObjectTiles1.bmp manually. You do this in the Pixel Editor. Go to Pixel Editor (at the top menu) and then Export CHR.

Save the file here: NESmaker_4_5_x\GameEngineData\Graphics\Sprites
Save the file as CHR_GameObjectTiles1.chr
PS! You need to do this every time you make a change to this file.
3. Go to Project Settings - Project Labels. Find Screen Bytes in the list on the left. Change UserScreenByte00 to GameObject Tileset.
4. While you're still in Project Settings, go to the Script Settings tab at the top. Under Banks you will find Bank15. Select it and click Edit. Modify the Bank15.asm file to include your new CHR file. Just add two new lines like this (add the text in yellow):
5. Go back to Project Settings - Script Settings, select Bank16 and click Edit. Go down to line 417. It should look like this:
6. Go to your Subroutines folder. You can find it here: NESmaker_4_5_x\GameEngineData\Routines\BASE_4_5\Game\Subroutines
Open the file called doLoadScreen.asm and go to line 384. It should like this:
7. Now you can decide what tileset to use for each screen. By default userScreenByte0 is set to 0, so it will load the default tileset. If you change userScreenByte0 to 1 the screen will load the new tileset instead.

That's it.
Before you begin make sure you have set up user screen bytes:
Making userScreenByte0-7 work! (Plus Bonus!)
Hey guys, got a quick code edit which will actually link those userScreenBytes on your Screen Info options! Why is this useful? Well, you can store a number in any of those 8 boxes, that is unique to the screen, and it will show up in a variable in game. This can give you some powerful...
1. In the GraphicAssets folder of your game copy GameObjectTiles.bmp and paste it in the same folder. Rename the new file to GameObjectTiles1.bmp. What you do next will depend on what you want to achieve. If you for example want the player to get an armor during a cutscene and start the next level with the player object wearing the armor, then you need to make sure that the tilesets are set up identically. If you want the player to have different colors you can just set up the new screen with a different palette.
GameObjectTiles.bmp
GameObjectTiles1.bmp
2. Before you test the game you need to export the CHR graphics for GameObjectTiles1.bmp manually. You do this in the Pixel Editor. Go to Pixel Editor (at the top menu) and then Export CHR.
Save the file here: NESmaker_4_5_x\GameEngineData\Graphics\Sprites
Save the file as CHR_GameObjectTiles1.chr
PS! You need to do this every time you make a change to this file.
3. Go to Project Settings - Project Labels. Find Screen Bytes in the list on the left. Change UserScreenByte00 to GameObject Tileset.
4. While you're still in Project Settings, go to the Script Settings tab at the top. Under Banks you will find Bank15. Select it and click Edit. Modify the Bank15.asm file to include your new CHR file. Just add two new lines like this (add the text in yellow):
Save the file and close it.GameObjectTiles00:
.incbin "Graphics\Sprites\CHR_GameObjectTiles.chr"
GameObjectTiles01:
.incbin "Graphics\Sprites\CHR_GameObjectTiles1.chr"
5. Go back to Project Settings - Script Settings, select Bank16 and click Edit. Go down to line 417. It should look like this:
Change it to this (add the text in yellow):GameObjectCHRAddLo:
.db <GameObjectTiles00
GameObjectCHRAddHi:
.db >GameObjectTiles00
Save the file and close it. Close Project Settings as well.GameObjectCHRAddLo:
.db <GameObjectTiles00
.db <GameObjectTiles01
GameObjectCHRAddHi:
.db >GameObjectTiles00
.db >GameObjectTiles01
6. Go to your Subroutines folder. You can find it here: NESmaker_4_5_x\GameEngineData\Routines\BASE_4_5\Game\Subroutines
Open the file called doLoadScreen.asm and go to line 384. It should like this:
Change it to this:LoadChrData #$15, #$00, #$00, #$80, GameObjectCHRAddLo, GameObjectCHRAddHi, #$00
Save the file and close it.LoadChrData #$15, #$00, #$00, #$80, GameObjectCHRAddLo, GameObjectCHRAddHi, userScreenByte0
7. Now you can decide what tileset to use for each screen. By default userScreenByte0 is set to 0, so it will load the default tileset. If you change userScreenByte0 to 1 the screen will load the new tileset instead.
That's it.
")
