crazygrouptrio
Active member
I wanted to wait until I got this system working exactly how I wanted before I shared it, and I finally reached that point! Apologies if this is a little confusing, and is a more intermediate tutorial, and requires altering and adding code in various places. Back up your project before diving in!
What is Manual Animation?
If you remember Joe's tutorial for the shooter module, he removed the draw sprites script with his own custom script that specifically drew the sprites to lessen the load on the system. This is an extension of that which allows objects to animate, with a few other neat options we'll get to further down. This is good for projectiles, objects that have looping animations, and will speed up our system slightly since we are specifically saying what sprites we want to draw, and in turn free up some space in Bank #$1C where NESmaker's standard animations are stored.
Step 1:
Create this User Variable
Step 2:
Open dohandleGameTimer, and add this bit of code anywhere in there.
This is our clock for animations. It'll make more sense later.
Step 3:
Go to your project labels, and under Monster Action Step Flags change Flag 5 to "Manual Animation" (any flag will work if you're already using this, but the code in this tutorial is for Flag 5). This is how we know if an action step uses Manual Animation or NESmaker's animation.
Step 4:
Go ahead and set up an object you want to manually animate. We'll just do the standard Projectile object (#$01) just below the player. REMEMBER, you do not need to make ANY animation for this object in NESmaker's UI. You can leave it's animation frames at 1 and sprites blank, it does not matter. Just set everything else as normal - that it's a projectile, speed, bounding box, etc. And make sure to check "Manual Animation" for the first action step. Again, animation speed does not matter and will be ignored.
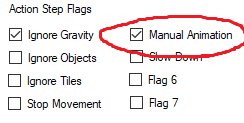
Note: This method applies to specific object states, so you can use NESmaker's animation system for other steps if you wish.
Step 5:
Now open up doHandleObjects_withinCamera, and just after "JustDrawObject" add this bit of code:
Replace #$YOURBANKHERE with whatever bank you decide to put the code. It can exist in any bank as far as I know, I use #$18 in mine. What this does is bypass the standard NESmaker draw/animation script with our own if the flag if checked.
Step 6:
Finally the manual animation code. Open up a new script and paste this code into it (we're going to add more code into the middle of it in the next steps).
This borrows some code from the draw sprite script, to decide if a sprite should be drawn, and destroys the sprite if it's off camera. This should be fine with scrolling games, but I've only really used it for single screen games. Save the script.
Now go to your Script Settings, add the new code like so:
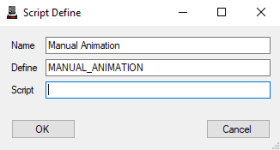
Then assign it to the script we just saved. Then go to whatever bank you decided to store this script, and add this line somewhere in the bank (isolated from other code is usually a safe spot)
Step 7:
Okay, now we begin the customization and you can see what all this code is for. Make sure you have your different frames drawn and know where they are on your sprite sheet, and know which palette you want them to use. In this tutorial we will be making a 1 tile object in GameObject #1 spot. To do so, start add this code at "LDA Object_type,x" line in the manual animation script:
What this does is check for Object 1 (aka your Projectile) and it checks with manualAnimation to decide which frame of animation is being drawn, making a 4 frame animation that loops depending on manualAnimation's number. Replace the "#TILE" in each frame with the number of the tile on your sprite sheet you wish to draw there. This would work well for making a ball roll for example. But that's it! If you've set up everything correctly the object will animate in 4 looping frames at a decent speed.
Customizing!:
To add more objects, simply follow the pattern I used for the projectile, and add more inside the script (remember, objects are numbered starting at 0 with the first game object, so the first monster would be 15, then 16, and so on. ManualAnimation runs through numbers until 32, so keep that in mind when animating. Numbers far away from each other will animate more slowly, quicker will be faster, etc. Just make sure the amount of frames you want are divisible by 32.
More fun examples!
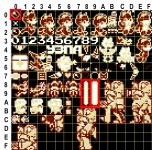
You can do a lot more than the bareboned example I provided for projectiles. Here is an example of how I used this to make the player only show a climbing animation while moving:
How this works is we have one action step for climbing checked for manual animation. The animation subroutine then checks to see if the player is pressing up or down. If no button is pressed it doesn't animate, but if it is, it alternates between drawing frame 1 and frame 2 to give a quick 2 frame animation!
Another example is the arrow in my game Tryptic:

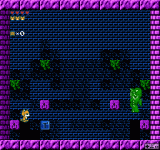
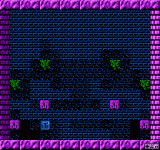
See how the arrow is changing? This is done with manualAnimation, simply drawing a different sprite depending on the arrow's location on the screen, and all using 1 single action step for the player object. This way we don't use as many assets or CPU while the arrow icons still look nice and feel very alive.
Additional Notes:
- Using this method as is, an object can only be animated a single way using manualAnimation. You could possibly have it draw something different depending on screentypes or userscreenbytes, but it would still apply to all action steps that are checked with manualAnimation on that object.
- This shows how to draw a single sprite tile, but you can also do several tiles if you wish. Just switch the "JMP drawManualSprite" to "JSR +thisTileIsInCamRange" then set the coordinates for the next sprite, and repeat until done. I've done this for up to 4x4 tile sized objects without any issue.
What is Manual Animation?
If you remember Joe's tutorial for the shooter module, he removed the draw sprites script with his own custom script that specifically drew the sprites to lessen the load on the system. This is an extension of that which allows objects to animate, with a few other neat options we'll get to further down. This is good for projectiles, objects that have looping animations, and will speed up our system slightly since we are specifically saying what sprites we want to draw, and in turn free up some space in Bank #$1C where NESmaker's standard animations are stored.
Step 1:
Create this User Variable
Code:
manualAnimationStep 2:
Open dohandleGameTimer, and add this bit of code anywhere in there.
Code:
INC manualAnimation
LDA manualAnimation
CMP #33
BNE +
LDA #$00
STA manualAnimation
+Step 3:
Go to your project labels, and under Monster Action Step Flags change Flag 5 to "Manual Animation" (any flag will work if you're already using this, but the code in this tutorial is for Flag 5). This is how we know if an action step uses Manual Animation or NESmaker's animation.
Step 4:
Go ahead and set up an object you want to manually animate. We'll just do the standard Projectile object (#$01) just below the player. REMEMBER, you do not need to make ANY animation for this object in NESmaker's UI. You can leave it's animation frames at 1 and sprites blank, it does not matter. Just set everything else as normal - that it's a projectile, speed, bounding box, etc. And make sure to check "Manual Animation" for the first action step. Again, animation speed does not matter and will be ignored.

Note: This method applies to specific object states, so you can use NESmaker's animation system for other steps if you wish.
Step 5:
Now open up doHandleObjects_withinCamera, and just after "JustDrawObject" add this bit of code:
Code:
;; We'll try manual animation here, so we can handle it in another bank
    LDA Object_vulnerability,x
        AND #%00010000
        BEQ +skip
        ;;; this object manually animates
        SwitchBank #$YOURBANKHERE
        JSR manuallyAnimate
        JMP ObjectDoesNotDraw
+skipStep 6:
Finally the manual animation code. Open up a new script and paste this code into it (we're going to add more code into the middle of it in the next steps).
Code:
manuallyAnimate:
; here we handle manually drawn objects
    LDA gameHandler
    AND #%01000000
    BEQ +doDrawThisSprite
    JMP +doneDrawingThisSprite
    +doDrawThisSprite
; set up static sprites or basic animations by the frame counter here
    LDA Object_x_hi,x
    SEC
    SBC camX
    STA tempA

    LDA Object_y_hi,x
    STA tempB
    ;;;;;;;;;;;;;;;;;;;;;;;;;;;;;;;;;;;;;;;;;;;;;;
    ; check which object is being manually drawn ;
    ;;;;;;;;;;;;;;;;;;;;;;;;;;;;;;;;;;;;;;;;;;;;;;

    LDA Object_type,x
    ;; objects manually drawn go here


    drawManualSprite:
    ; store actual sprite # last
    STA tempC
    ; still need to check if we should draw it
    JSR +evaluateTileAgainstCameraPosition
    BEQ +thisTileIsInCamRange
        DestroyObject ; this makes sure that it stops existing, whether it's drawn or not

    JMP +doneDrawingThisSprite
    +thisTileIsInCamRange

    ;;;;;;;;;;    x   ,  y   , object, palette
    DrawSprite tempA, tempB, tempC, tempD
    +doneDrawingThisSprite
    RTS

    ;; evaluation camera
    +evaluateTileAgainstCameraPosition:

    LDA Object_x_hi,x
    STA pointer
    LDA Object_screen,x
    AND #%00001111
    STA pointer+1

    LDA pointer


    Compare16 pointer+1, pointer, camX_hi, camX
    ; arg0 = high byte of first value
    ; arg1 = low byte of first value
    ; arg2 = high byte of second value
    ; arg3 = low byte of second value

    +
    JMP +checkRightForDrawingOffCamera

    ++
        LDA #$01
        RTS
+checkRightForDrawingOffCamera
    LDA Object_x_hi,x
    CLC
    ADC self_right
    STA pointer
    LDA Object_screen,x
    ADC #$00
    AND #%00001111
    STA pointer+1

    LDA camX

    STA pointer5
    LDA camX+1
    clc
    ADC #$01
    STA temp
    Compare16 pointer+1, pointer, temp, pointer5; camX
    +
    LDA #$01
    rts
    ++
    LDA #$00
rtsNow go to your Script Settings, add the new code like so:

Then assign it to the script we just saved. Then go to whatever bank you decided to store this script, and add this line somewhere in the bank (isolated from other code is usually a safe spot)
Code:
.include MANUAL_ANIMATIONStep 7:
Okay, now we begin the customization and you can see what all this code is for. Make sure you have your different frames drawn and know where they are on your sprite sheet, and know which palette you want them to use. In this tutorial we will be making a 1 tile object in GameObject #1 spot. To do so, start add this code at "LDA Object_type,x" line in the manual animation script:
Code:
LDA Object_type,x
    ;; objects manually drawn go here
    CMP #1 ; projectile
    BNE +
    JMP +makeProjectile
    +
           ; CMP with more objects here
    JMP +doneDrawingThisSprite

    +makeProjectile:
    LDA #$00
    STA tempD ; use subpalette 0 for all frames
    LDA manualAnimation
    CMP #4
    BCC +frame1
    CMP #8
    BCC +frame2
    CMP #12
    BCC +frame3
    CMP #16
    BCC +frame4
    CMP #20
    BCC +frame1
    CMP #24
    BCC +frame2
    CMP #28
    BCC +frame3
    CMP #33
    BCC +frame4
    JMP +doneDrawingThisSprite

    +frame1
    LDA #TILE1 ; first frame
    JMP drawManualSprite

    +frame2
    LDA #TILE2 ; second frame
    JMP drawManualSprite

    +frame3
    LDA #TILE3; third frame
    JMP drawManualSprite

    +frame4
    LDA #TILE4 ; fourth frame
    JMP drawManualSprite
What this does is check for Object 1 (aka your Projectile) and it checks with manualAnimation to decide which frame of animation is being drawn, making a 4 frame animation that loops depending on manualAnimation's number. Replace the "#TILE" in each frame with the number of the tile on your sprite sheet you wish to draw there. This would work well for making a ball roll for example. But that's it! If you've set up everything correctly the object will animate in 4 looping frames at a decent speed.
Customizing!:
To add more objects, simply follow the pattern I used for the projectile, and add more inside the script (remember, objects are numbered starting at 0 with the first game object, so the first monster would be 15, then 16, and so on. ManualAnimation runs through numbers until 32, so keep that in mind when animating. Numbers far away from each other will animate more slowly, quicker will be faster, etc. Just make sure the amount of frames you want are divisible by 32.
More fun examples!
You can do a lot more than the bareboned example I provided for projectiles. Here is an example of how I used this to make the player only show a climbing animation while moving:
Code:
LDA #$00 ; player uses this palette
    STA tempD
    ; this will make the climbing player
    ; if the gamepad is being pressed we want to animate it, else we don't
    LDA gamepad
    AND #%00110000
    BNE +isPress
    ; we're not animating
    climbFrame1:
        ; first climbing animation goes here
        JMP drawManualSprite
    +isPress
    ; we are animating
        LDA manualAnimation
        AND #%00001000
        BNE climbFrame1
        ; else it's frame 2
JMP drawManualSpriteAnother example is the arrow in my game Tryptic:

See how the arrow is changing? This is done with manualAnimation, simply drawing a different sprite depending on the arrow's location on the screen, and all using 1 single action step for the player object. This way we don't use as many assets or CPU while the arrow icons still look nice and feel very alive.
Additional Notes:
- Using this method as is, an object can only be animated a single way using manualAnimation. You could possibly have it draw something different depending on screentypes or userscreenbytes, but it would still apply to all action steps that are checked with manualAnimation on that object.
- This shows how to draw a single sprite tile, but you can also do several tiles if you wish. Just switch the "JMP drawManualSprite" to "JSR +thisTileIsInCamRange" then set the coordinates for the next sprite, and repeat until done. I've done this for up to 4x4 tile sized objects without any issue.

