CatfortSoftware
New member
Found a way to move screen to screen, and I thought I'd share what I was able to get together since I don't see it around here anywhere.
The goal of this system is to create a tile collision type that can be placed at the edge of the screen that will send the player to the next screen over, akin to LoZ.
If you don't have a spot for them already, create a new asm file for custom tables (ie CustomTables.asm) and place it in the subroutines folder. then, open up the LoadAllSubroutines.asm from the same folder, and include your custom tables file under the include for ToggleTables.asm.
add three tables to the file, as shown below.
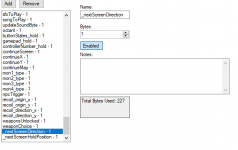
next, in your project settings, we'll need to add two new variables to the OverflowRAM- _nextScreenDirection, and _nextScreenHoldPosition, 1 byte each

Next, create a new tile script called ChangeScreenTile.asm. in your projects settings, assign ChangeScreenTile.asm to one of the tile collision scripts.
open it up, and add the following code. the code works as follows:
Our last goal is to set up loading a screen by this method. When calling the WarpToScreen Macro, the third argument is usually used to denote warp type, and is processed in doLoadScreenData.asm.
#$00 skips the whole thing, #$01 uses the position stored in the screen info, and #$02 is used for if you do a continue. This leaves us the ability to expand on what we can do by using up #$03 for moving screen to screen.
in doLoadScreenData.asm, look for the Warp In Position code (as of writing, this will be around line 99 in 4.5.9). replace it with the following. this code adds a branch for a screen transition type of #$03, and loads up the position we want to place the character at from the data we stored off. if it was a vertical change, we load up the Y position from the ScreenChangeWarpValues table, and the X position from the value we stored off from the collision. vice versa for horizontal changes.
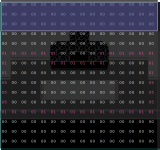
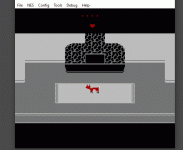
lastly, in your nametable, add some screen change collision at the edges. I have them as tile 05, as seen in the reference image below:

if the player collides with the tiles on the left side of the screen, they will move one name table to the left. if the player collides with the tiles on the right side of the screen, they will move one nametable to the right. when I have vertical exits, I place them at the tile above and below the black bar and hud, and have those tile locations defined as my vertical edges in ScreenChangeEdges.
the player will appear on the next screen at the edge on the opposite side, with the opposite value being determined in ScreenChangeWarpValues. since my character is 3 sprites wide, for instance, I'll need to make a little extra buffer space to ensure that my sprite doesn't wrap around when I enter from the right side of the screen.
and there you have it! that should get you a pretty good screen to screen movement. the only small bug I have right now with it is that you sometimes cannot move in certain directions at the entry point, but it's not currently a hinderance to overall gameplay. But this should be a good start!

The goal of this system is to create a tile collision type that can be placed at the edge of the screen that will send the player to the next screen over, akin to LoZ.
If you don't have a spot for them already, create a new asm file for custom tables (ie CustomTables.asm) and place it in the subroutines folder. then, open up the LoadAllSubroutines.asm from the same folder, and include your custom tables file under the include for ToggleTables.asm.
Code:
...
    .include ROOT\Game\Subroutines\doCleanUpSpriteRam.asm
    .include ROOT\Game\Subroutines\doWaitFrame.asm
    .include ROOT\Game\Subroutines\doHandleBounds.asm
    .include ROOT\Game\Subroutines\doLoadScreen.asm
    .include ROOT\Game\Subroutines\doLoadScreen2.asm

    .include ROOT\Game\Subroutines\ToggleTables.asm
    .include ROOT\Game\Subroutines\CustomTables.asm         ;custom table goes here
    .include ROOT\Game\Subroutines\ejectionSubroutines.asm
    .include ROOT\Game\Subroutines\doLoadScreenData.asm
...
add three tables to the file, as shown below.
Code:
ScreenChangeEdges: ;tile positions that allow screen changes (from down, up, left, right), adjust as needed for HUD placement

.db #$B0, #$30, #$00, #$F0 ;I'm using #$B0 and #$30 for my vertical exit tiles, since I have a 3 tile HUD and a 3 tile black bar at the bottom of the screen

ScreenChangeWarpValues: ;tile offsets for screen entry (from down, up, left, right), adjust as needed for sprite size and HUD

.db #$30, #$B0, #$E8, #$00 ;since my character is 3 sprites wide, I need to adjust my right side entry a half tile to not wrap around

ScreenChangeDirectionMasks: ;0000DULR, used to check against the players' current facing direction

.db #%00001000, #%00000100, #%00000010, #%00000001

ScreenChangeFacingTable: ;in the facing direction order, converts facing direction into a 0000DULR format

.db #%00001000, #%00001001, #%00000001, #%00000101, #%00000100, #%00000110, #%00000010, #%00001010
next, in your project settings, we'll need to add two new variables to the OverflowRAM- _nextScreenDirection, and _nextScreenHoldPosition, 1 byte each

Next, create a new tile script called ChangeScreenTile.asm. in your projects settings, assign ChangeScreenTile.asm to one of the tile collision scripts.
open it up, and add the following code. the code works as follows:
- if collision is with the player,
- initialize Y and _nextScreenDirection to 0, and store off currentNametable. we'll increment Y for each direction check, going 0-3 for down, up, left, and right respectively.
- store off xHold_hi into _nextScreenHoldPosition and check the collided tile's y position against the value in ScreenChangeEdges at Y.
- if the tile is at the bottom or top of the screen, add or subtract 1 respectively from the current nametable's left nibble, and jump to the end of the direction check.
- else, store off yHold_hi into _nextScreenHoldPosition, and check the collided tile's x position against the value in ScreenChangeEdges at Y.
- if the tile is at the right or left of the screen, add or subtract 1 respectively from the current nametable's right nibble, and jump to the end of the direction check.
- if we found a direction, store Y off into _nextScreenDirection. if not, jump to done.
- get the player's facing direction, get it's adjusted direction-per-bit value from ScreenChangeFacingTable, and compare it to the ScreenChangeDirectionMasks at the index of _nextScreenDirection.
- AND the values together. if the result is 0, jump to done.
- else, we had a succesful warp! load our current Map from warpMap into warpToMap, and store the adjusted nametable value into warpToScreen. then, call the WarpToScreen macro, with #$03 as our transition type
Code:
    CPX player1_object
    BEQ +isPlayer

        JMP +done

    +isPlayer

    LDA #$00
    STA _nextScreenDirection

    ;compare tile location to defined edges.
    ;this can probably be compressed down into a loop with
    ;some parlor trickery, but this will do the job

    ;check for vertical exit, maintaining the X position
    LDA xHold_hi
    STA _nextScreenHoldPosition

    LDA currentNametable
    STA temp

    LDY #$00
    LDA tileY
    AND #$F0
    CMP ScreenChangeEdges,y
    BCC +notDown

        LDA temp
        CLC
        ADC #$10
        STA temp
        JMP +foundNextScreenDirection
    +notDown

    INY
    LDA tileY
    AND #$F0
    CMP ScreenChangeEdges,y
    BEQ +up
    BCS +notUp
    +up
        LDA temp
        SEC
        SBC #$10
        STA temp
        JMP +foundNextScreenDirection
    +notUp


    ;check for horizontal exit, maintaining the Y position
    LDA yHold_hi
    STA _nextScreenHoldPosition

    INY
    LDA tileX
    AND #$F0
    CMP ScreenChangeEdges,y
    BEQ +left
    BCS +notLeft
    +left
        LDA temp
        SEC
        SBC #$01
        STA temp
        JMP +foundNextScreenDirection
    +notLeft

    INY
    LDA tileX
    AND #$F0
    CMP ScreenChangeEdges,y
    BCC +notRight

        LDA temp
        CLC
        ADC #$01
        STA temp
        JMP +foundNextScreenDirection
    +notRight
        JMP +done

    +foundNextScreenDirection

    STY _nextScreenDirection
    ;check if we're facing the correct direction - will give is the ability to warp closer to the edge on the next screen
    ;and not trigger the screen change tiles

    LDA Object_direction, x
    AND #%00000111
    TAY
    LDA ScreenChangeFacingTable, y
    STA temp1
    LDY _nextScreenDirection
    LDA ScreenChangeDirectionMasks, y
    STA temp2

    LDA temp1
    AND temp2
    BEQ +done

        ;succesful warp!

        LDA warpMap
        STA warpToMap

        LDA temp
        STA warpToScreen

        WarpToScreen warpToMap, warpToScreen, #$03
        ;; arg0 = warp to map.  0= map1.  1= map2.
        ;; arg1 = screen to warp to.
        ;; arg2 = screen transition type - most likely use 1 here.
            ;; 1 = warp, where it observes the warp in position for the player.
+done
Our last goal is to set up loading a screen by this method. When calling the WarpToScreen Macro, the third argument is usually used to denote warp type, and is processed in doLoadScreenData.asm.
#$00 skips the whole thing, #$01 uses the position stored in the screen info, and #$02 is used for if you do a continue. This leaves us the ability to expand on what we can do by using up #$03 for moving screen to screen.
in doLoadScreenData.asm, look for the Warp In Position code (as of writing, this will be around line 99 in 4.5.9). replace it with the following. this code adds a branch for a screen transition type of #$03, and loads up the position we want to place the character at from the data we stored off. if it was a vertical change, we load up the Y position from the ScreenChangeWarpValues table, and the X position from the value we stored off from the collision. vice versa for horizontal changes.
Code:
...
;; 128 - Warp In Position
;; This might need to be skipped under certain warp conditions
;; and should only be observed if the transition is of warp type.
    LDA screenTransitionType
    BEQ skipSettingWarpInXY
    CMP #$01
    BEQ setToStartValue
    CMP #$02
    BEQ setToContinueValue
    CMP #$03                ;here we add the branch to screen changes
    BEQ setToNextScreenValue
        ;;; other cases go here
setToContinueValue
    LDA continueX
    STA newX
    LDA continueY
    STA newY
    JMP skipSettingWarpInXY
setToStartValue:

    LDA (collisionPointer),y
    AND #%11110000
    STA newY

    LDA (collisionPointer),y
    AND #%00001111
    ASL
    ASL
    ASL
    ASL
    STA newX
    JMP skipSettingWarpInXY

setToNextScreenValue: ;here we get our stored values from our screen change and load the position

    TYA
    PHA

        LDY _nextScreenDirection
        LDA ScreenChangeWarpValues, y
        STA temp

    PLA
    TAY

    LDA _nextScreenDirection
    CMP #$02
    BCS +notVertical

        ;is vertical
        LDA temp
        STA newY
        LDA _nextScreenHoldPosition
        STA newX
        JMP +doneWithScreenShift

    +notVertical

        ;is horizontal
        LDA temp
        STA newX
        LDA _nextScreenHoldPosition
        STA newY

    +doneWithScreenShift

    LDA #$00
    STA _nextScreenDirection

skipSettingWarpInXY:
    LDA #$00
    STA screenTransitionType ;; reset screen transition type
...
lastly, in your nametable, add some screen change collision at the edges. I have them as tile 05, as seen in the reference image below:

if the player collides with the tiles on the left side of the screen, they will move one name table to the left. if the player collides with the tiles on the right side of the screen, they will move one nametable to the right. when I have vertical exits, I place them at the tile above and below the black bar and hud, and have those tile locations defined as my vertical edges in ScreenChangeEdges.
the player will appear on the next screen at the edge on the opposite side, with the opposite value being determined in ScreenChangeWarpValues. since my character is 3 sprites wide, for instance, I'll need to make a little extra buffer space to ensure that my sprite doesn't wrap around when I enter from the right side of the screen.
and there you have it! that should get you a pretty good screen to screen movement. the only small bug I have right now with it is that you sometimes cannot move in certain directions at the entry point, but it's not currently a hinderance to overall gameplay. But this should be a good start!

